
Elvis Presley Memorabilia Price Guide: An Overview
This guide comprehensively details the vibrant Elvis Presley collectibles market‚ covering records‚ posters‚ and unique items․ Jerry Osborne’s price guides
are invaluable resources for enthusiasts seeking accurate valuations and historical context․
HobbyDB provides a dynamic database with over 420 Elvis items‚ tracking fluctuating values and offering insights into rarity․ Understanding these factors is crucial for collectors․
Understanding the Elvis Collectibles Market
The Elvis Presley collectibles market is remarkably diverse‚ encompassing everything from common novelties to incredibly rare and valuable artifacts․ Its strength stems from the enduring global popularity of “The King” and the breadth of his career – music‚ movies‚ and cultural impact․
Demand is driven by dedicated fans‚ investors‚ and those seeking a tangible connection to Elvis’s legacy․ The market is influenced by factors like condition‚ rarity‚ provenance (history of ownership)‚ and authentication․ HobbyDB highlights the extensive range of items‚ exceeding 420 dedicated to Elvis․ Jerry Osborne’s guides are essential for navigating this complex landscape‚ providing a foundational understanding of pricing trends and collectible categories․ Auction sites like eBay also offer real-time market data‚ though careful research is vital․
Factors Influencing Memorabilia Value
Several key factors dictate the value of Elvis Presley memorabilia․ Condition is paramount; items in pristine condition command significantly higher prices․ Rarity plays a crucial role – limited-edition items or those with low production numbers are highly sought after․ Provenance‚ or the item’s documented history of ownership‚ adds substantial value‚ especially if linked to Elvis directly․
Authentication is critical‚ protecting buyers from forgeries․ Leading grading companies provide expert assessments‚ verifying authenticity and assigning a grade․ Demand also influences price; items tied to iconic moments or popular songs tend to be more valuable․ Jerry Osborne’s price guides offer insights into these factors‚ while online auction sites demonstrate current market trends․ Ultimately‚ value is determined by what a collector is willing to pay․
Elvis Presley Records: A Price Breakdown
Elvis’s record values vary widely‚ from common pressings to incredibly rare singles and albums․ Osborne’s guide details pricing for LPs‚ EPs‚ and 78s‚ essential for collectors․
Early Singles & 78s: Value Ranges
Early Elvis Presley singles and 78s represent the pinnacle of collectible value for many enthusiasts․ First pressings of landmark recordings like “Heartbreak Hotel” and “Hound Dog” command significant premiums‚ often reaching thousands of dollars depending on condition and rarity․ The condition is paramount; pristine‚ unplayed copies are worth exponentially more than those showing wear․

Regional variations and promotional copies further complicate pricing‚ with some obscure releases fetching surprisingly high figures․ Jerry Osborne’s price guide provides a detailed breakdown of value ranges based on record label‚ pressing details‚ and grading standards․ Generally‚ expect to pay hundreds‚ if not thousands‚ for truly exceptional examples of these early recordings‚ making careful authentication crucial․
Factors like label variations (e․g․‚ RCA Victor) and matrix numbers significantly impact value‚ requiring specialized knowledge for accurate assessment․
LP Albums: First Pressings & Rarities

Elvis Presley’s LP albums‚ particularly first pressings‚ are highly sought after by collectors․ Early albums like his self-titled debut and subsequent releases in mono are especially valuable․ Rarity is driven by factors like limited press runs‚ unique label variations‚ and promotional copies․ First pressings often feature distinct matrix numbers and cover artwork details that differentiate them from later releases․
Condition plays a critical role; albums graded as “mint” or “near mint” command substantial premiums․ Jerry Osborne’s guide offers detailed pricing information based on pressing details and condition․ Certain albums with unique characteristics‚ such as misprints or limited-edition colored vinyl‚ can fetch exceptionally high prices․ Authenticating a first pressing requires careful examination of label details and matrix numbers․
Expect to invest significantly for truly exceptional examples‚ making research essential․
EPs & Compilations: Assessing Worth
Elvis Presley EPs and compilations present a nuanced valuation challenge for collectors․ While generally less expensive than early singles or first-pressing LPs‚ certain releases hold significant value․ Early UK EPs‚ for example‚ are often highly sought after due to limited distribution․ Compilations featuring rare tracks or unique artwork can also command higher prices․
Assessing worth requires considering the EP’s country of origin‚ label variations‚ and overall condition․ Jerry Osborne’s price guide provides a starting point‚ but online auction sites like eBay offer real-time market data․ Rarity is key; promotional copies or those with unique packaging are particularly valuable․ Condition‚ as with all collectibles‚ significantly impacts price․
Careful research and comparison are crucial for accurate valuation․

Elvis Presley Memorabilia: Key Collectibles
Highly desirable items include concert programs‚ movie posters‚ and clothing‚ with authentication being paramount․ These pieces offer a tangible connection to the King’s legendary career․
Concert Programs & Tickets: Historical Significance
Elvis Presley concert programs and tickets represent a direct link to pivotal moments in music history‚ offering collectors a tangible piece of the excitement․ Early programs‚ particularly those from his initial touring years and Las Vegas residencies‚ command significant value․ Condition is critical; pristine‚ uncreased programs are worth considerably more than those showing wear․
Tickets from iconic performances‚ especially those with unique features like holographic stamps or artist signatures‚ are highly sought after․ The historical context of the concert – a first performance in a city‚ a benefit show‚ or a particularly memorable event – dramatically influences the price․ Collectors often seek complete sets of tickets from a single tour․ Authentication is essential‚ verifying the program or ticket’s legitimacy and provenance‚ ensuring its value and historical accuracy․
Movie Posters & Lobby Cards: Condition is Key
Elvis Presley’s prolific film career generated a wealth of collectible movie posters and lobby cards‚ prized for their vibrant imagery and cultural significance․ Value hinges dramatically on condition; posters graded as “mint” or “near mint” fetch the highest prices․ Factors like creases‚ tears‚ fading‚ and restoration significantly diminish worth․
First release posters‚ particularly those in larger sizes and with rare variations‚ are especially desirable․ Lobby cards‚ often sold in sets‚ are more affordable but still valuable‚ especially complete sets from popular films․ Authentication is crucial‚ verifying originality and preventing forgeries․ Collectors prioritize posters with vivid colors and minimal flaws‚ reflecting the era’s cinematic appeal․ Proper storage and preservation are vital to maintain their condition and value․
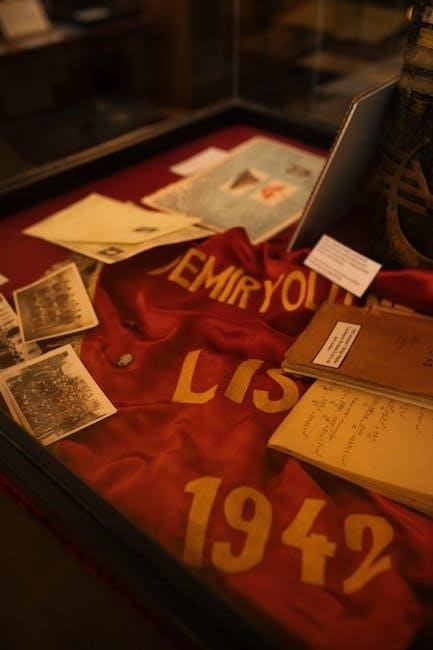
Clothing & Stage Worn Items: Authentication Matters
Elvis Presley’s stage attire and personal clothing represent the pinnacle of memorabilia collecting‚ commanding substantial prices․ However‚ authentication is paramount due to the prevalence of fakes and reproductions․ Items with verifiable provenance – a clear chain of ownership linking them directly to Elvis – are exponentially more valuable․

Jackets‚ jumpsuits‚ scarves‚ and even everyday wear worn by the King can fetch tens or even hundreds of thousands of dollars․ Expert authentication services meticulously examine fabrics‚ stitching‚ and historical records to confirm authenticity․ Documentation‚ such as letters‚ photographs‚ or witness statements‚ strengthens provenance․ Collectors prioritize items with compelling stories and demonstrable connections to Elvis’s life and performances․ Beware of items lacking solid proof of origin․

Specific Collectibles & Their Price Points
Diverse items like bubble gum cards‚ lunch boxes‚ and keychains offer entry points for collectors‚ with values determined by grading‚ rarity‚ and overall condition․
Elvis Presley Bubble Gum Cards: Grading & Rarity
Elvis Presley bubble gum cards‚ released in 1956 by Fleishman Distributing Corporation‚ represent a fascinating niche within the broader Elvis collectibles market․ Their value is heavily influenced by condition‚ with cards graded by professional services like PSA or SGC commanding significant premiums․ A mint condition card can fetch hundreds‚ even thousands‚ of dollars‚ while lower grades are more affordable․
Rarity plays a crucial role; certain variations‚ such as those with printing errors or specific back designs‚ are exceptionally scarce․ The No․ 12 card‚ featuring Elvis in a blue suit‚ is often considered the most desirable․ Collectors meticulously assess centering‚ corners‚ edges‚ and surface quality when determining a card’s grade․ Understanding these nuances is essential for both buyers and sellers navigating this specialized segment of the Elvis memorabilia world․
Lunch Boxes & Thermoses: Popularity & Condition
Elvis Presley lunch boxes and thermoses‚ popular during the 1960s and 70s‚ remain highly sought-after collectibles․ Their appeal stems from nostalgia and their representation of a cultural icon․ Condition is paramount; boxes in pristine condition‚ retaining their original vibrancy and with minimal wear‚ command the highest prices․ The presence of the original thermos is a significant value booster․
Rarity also influences pricing‚ with certain variations or limited-edition releases being particularly valuable․ Collectors assess factors like fading‚ dents‚ rust‚ and the integrity of the latch and handle․ A well-preserved lunch box can easily fetch several hundred dollars‚ while those with significant damage will be worth considerably less․ Jerry Osborne’s price guide offers valuable insights into current market values․
Keychains & Novelty Items: Affordable Collectibles
Elvis Presley keychains and various novelty items represent an accessible entry point for collectors on a budget․ While not commanding the prices of rarer memorabilia‚ these items offer a tangible connection to the King’s legacy․ Their value is largely determined by age‚ condition‚ and the uniqueness of the design․ Early keychains‚ particularly those featuring distinctive imagery or materials‚ can be more desirable․
Condition plays a role‚ with items showing minimal wear and tear fetching higher prices․ Novelty items like pens‚ wallets‚ and pins also fall into this category‚ offering affordability and variety․ HobbyDB lists numerous examples‚ showcasing the breadth of available items․ These collectibles are ideal for starting or expanding an Elvis Presley collection without significant financial investment․

Collectible Plates & Limited Editions
Bradford Exchange plates‚ while marketed as collectibles‚ often retain limited resale value‚ frequently less than the original purchase price․ Demand is a key factor․
Bradford Exchange Plates: Current Market Value
Elvis Presley collectible plates from the Bradford Exchange generally don’t appreciate significantly in value post-production․ While initially appealing to fans‚ the market is often saturated with these limited editions‚ impacting resale prices․ Quora discussions highlight that many such items sell for less than their original cost‚ often considerably so․
Factors influencing value include plate condition‚ original packaging‚ certificate of authenticity‚ and overall demand․ However‚ even pristine‚ complete sets rarely command high prices․ Expect to find most Bradford Exchange Elvis plates selling in the $20-$50 range‚ with some rarer or larger plates potentially reaching $75-$100․ It’s crucial to temper expectations and view these primarily as fan items rather than investments․
Other Limited Edition Collectibles: Assessing Demand
Beyond Bradford Exchange plates‚ numerous limited edition Elvis Presley collectibles exist – figurines‚ sculptures‚ and commemorative items․ Assessing their demand requires careful consideration‚ as the market is highly variable․ Generally‚ items directly linked to significant Elvis events or featuring unique designs perform better․
Factors like production run size‚ artist involvement‚ and historical context heavily influence value․ Items with low production numbers and strong provenance tend to attract higher bids․ However‚ many limited editions suffer from overproduction‚ leading to stagnant or declining resale values․ Utilizing resources like hobbyDB and completed auction listings on eBay is vital for gauging current market interest and establishing realistic price expectations․

Authentication & Grading Services
Authenticating Elvis memorabilia is vital‚ given the prevalence of forgeries; Professional grading assesses condition‚ impacting value significantly․ Leading companies provide expert opinions and certification for collectors․
Importance of Authentication
The Elvis Presley memorabilia market‚ while exciting‚ unfortunately attracts fraudulent items․ Therefore‚ authentication isn’t merely recommended; it’s absolutely essential for protecting your investment and ensuring the legitimacy of your prized possessions․ Without proper verification‚ you risk acquiring a reproduction or outright fake‚ significantly diminishing its value – or worse‚ overpaying for something worthless․
Authentication establishes provenance‚ tracing the item’s history and verifying its connection to Elvis himself․ This process involves expert examination‚ comparing details against known genuine examples‚ and scrutinizing documentation․ A Certificate of Authenticity (COA) from a reputable source provides assurance and builds confidence in your purchase․ It safeguards against costly mistakes and preserves the integrity of the Elvis Presley collectibles community․
Investing in authenticated items guarantees you’re owning a genuine piece of rock and roll history‚ worthy of display and potential appreciation․
Leading Grading Companies for Elvis Memorabilia
Several reputable companies specialize in authenticating and grading Elvis Presley memorabilia‚ providing collectors with expert assessments․ PSA/DNA is a highly respected leader‚ known for its rigorous examination of autographs and historical documents‚ offering a trusted certification process․ James Spence Authentication (JSA) is another prominent firm‚ providing similar services with a strong reputation for accuracy․
Beckett Authentication Services (BAS) also plays a significant role‚ particularly for autographs and collectibles․ These companies employ experienced authenticators who meticulously analyze items‚ considering factors like ink type‚ paper quality‚ and historical context․ Their grading scales assess condition‚ impacting value‚ with higher grades commanding premium prices․
Choosing a recognized grading company ensures an unbiased and professional evaluation‚ maximizing the resale potential and safeguarding your investment in Elvis Presley collectibles․
Resources for Price Research
Jerry Osborne’s price guides remain essential‚ while eBay and hobbyDB offer real-time auction data and extensive databases for current market valuations․
Jerry Osborne’s Price Guides
Jerry Osborne is widely recognized as a leading authority on Elvis Presley collectibles‚ and his price guides are considered foundational resources for serious collectors․ The Official Price Guide to Elvis Presley Records and Memorabilia‚ in its various editions‚ provides a comprehensive overview of the market‚ detailing values for records‚ bubble gum cards‚ posters‚ and a vast array of other items․
Osborne’s guides are particularly valuable for their detailed listings of record variations – singles‚ EPs‚ LPs‚ and compilations – and their insights into the factors that influence pricing‚ such as condition‚ rarity‚ and pressing information․ These guides offer a historical perspective‚ tracing the evolution of Elvis memorabilia and providing context for current market trends․ They are an indispensable tool for anyone seeking to accurately assess the worth of their Elvis Presley collection or to make informed purchasing decisions․
Online Auction Sites & Databases (eBay‚ hobbyDB)
Online platforms like eBay and hobbyDB are essential tools for researching current market values of Elvis Presley memorabilia․ eBay provides a real-time view of what collectors are willing to pay‚ offering a broad range of items and auction results to analyze․ However‚ it’s crucial to consider completed sales to determine actual prices‚ rather than relying on asking prices․
HobbyDB‚ specifically‚ offers a dedicated database with over 420 Elvis items‚ tracking price fluctuations and providing detailed information on rarity and variations․ This platform allows users to monitor trends and compare prices across different collectibles․ Utilizing both eBay’s auction data and hobbyDB’s curated database provides a well-rounded approach to price research‚ ensuring informed decisions when buying or selling;