
Yamaha MG16XU Manual: A Comprehensive Guide
This guide provides detailed information about the Yamaha MG16XU mixing console, covering operation, setup, and troubleshooting. It encompasses the MG20XU/MG20, MG16XU/MG16X/MG16, and MG12XU/MG12X/MG12 models.
The Yamaha MG16XU is a versatile and highly regarded mixing console, popular among musicians, audio engineers, and content creators. This compact 16-channel mixer blends professional-grade sound quality with intuitive operation, making it suitable for both live performances and studio recording. It’s designed to deliver exceptional audio clarity and flexibility, offering a range of features that cater to diverse audio needs.
This mixer stands out due to its built-in effects, USB audio interface, and robust construction. The MG16XU provides a comprehensive solution for managing audio signals, offering precise control over equalization, routing, and dynamics. It’s a central hub for connecting microphones, instruments, and other audio sources, allowing you to shape and refine your sound with ease.
Understanding the capabilities of the MG16XU is crucial for maximizing its potential. This guide will walk you through every aspect of the mixer, from initial setup and connections to advanced features like aux sends, USB recording, and troubleshooting common issues. Whether you’re a seasoned professional or a beginner, this resource will empower you to harness the full power of the Yamaha MG16XU.
Understanding the MG16XU’s Key Features
The Yamaha MG16XU boasts several key features that contribute to its popularity and versatility. A standout is its integrated USB audio interface, enabling direct recording and playback with a computer, simplifying the workflow for musicians and producers. The built-in effects – reverb, delay, chorus, and more – add professional polish to live performances and recordings without needing external processors.
Each channel strip offers a 3-band EQ for precise tonal shaping, alongside aux sends for creating monitor mixes or feeding external effects units. The mixer’s robust construction ensures durability, while its compact size makes it portable and convenient for various applications. The MG16XU supports a wide range of input sources, including microphones, instruments, and line-level signals.

Furthermore, the mixer’s intuitive layout and clear labeling make it easy to navigate, even for beginners. Its phantom power supply accommodates condenser microphones, expanding its recording capabilities. These features combined make the MG16XU a powerful and flexible tool for anyone involved in audio production or live sound reinforcement.
Locating and Downloading the Official Yamaha Manual
Accessing the official Yamaha MG16XU manual is crucial for understanding its full functionality and ensuring optimal performance. Several online resources provide free PDF downloads of the manual, covering the MG20XU/MG20, MG16XU/MG16X/MG16, and MG12XU/MG12X/MG12 models. Manualzz and other document-sharing websites host the complete owner’s manual, offering convenient access.

Yamaha’s official website is also a reliable source, though navigation can sometimes be less direct. Searching for “Yamaha MG16XU manual” on Google will yield numerous links to legitimate download sources. These manuals detail everything from initial setup and connections to advanced features like USB interfacing and effects processing.
Downloading the PDF allows offline access and easy searching for specific information. It’s recommended to download the manual directly from Yamaha or a trusted source to avoid potentially corrupted or outdated files. Having the manual readily available will greatly enhance your experience with the MG16XU, enabling you to troubleshoot issues and maximize its capabilities.
MG16XU: Model Variations Covered in the Manual (MG20XU/MG20, MG16XU/MG16X/MG16, MG12XU/MG12X/MG12)
The Yamaha MG16XU manual isn’t solely dedicated to the MG16XU; it’s a comprehensive guide encompassing a range of related Yamaha mixing consoles. This includes the larger MG20XU/MG20, offering more channels and features, and the more compact MG12XU/MG12X/MG12, suitable for smaller setups.
The manual intelligently addresses variations between models. When specific features differ – such as the number of aux sends or the inclusion of certain effects – the manual clearly indicates these differences using bracketed notations, for example, “[MG16XU/MG16X/MG16]”. This ensures users of any covered model can find relevant information.
Understanding this broader scope is vital. Even if you own an MG16X, the manual provides valuable insights into the capabilities of the MG20XU and MG12XU. This unified approach streamlines support and provides a consistent learning experience across the Yamaha MG Series. The manual’s structure allows for efficient navigation, regardless of your specific console.
Initial Setup and Connections
Proper initial setup is crucial for optimal performance of your Yamaha MG16XU. Begin by carefully unpacking the mixer and inspecting for any shipping damage. Ensure you have all necessary power cables and audio leads readily available.
Connect the power cable to a grounded outlet. Before connecting any audio sources, verify the mixer’s voltage setting matches your local power supply. Next, connect your microphones, instruments, and other audio devices to the appropriate input channels. Use balanced XLR cables for microphones to minimize noise.
Connect the main outputs to your amplifier or recording interface. If utilizing monitors, connect them to the monitor outputs. Remember to power on the mixer after all connections are made. Double-check all connections before increasing the master volume to prevent potential damage to your speakers.
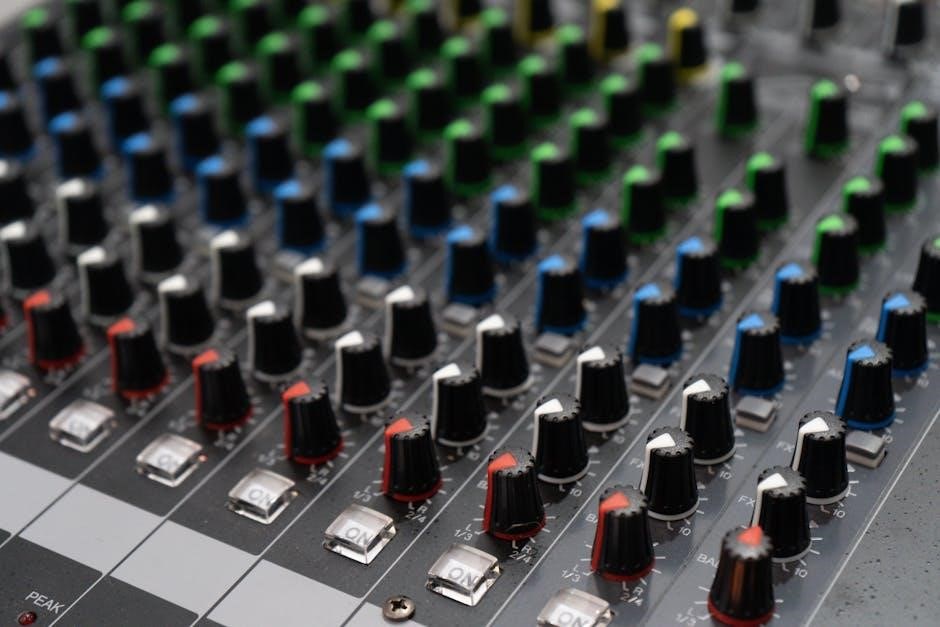
Channel Strip Overview: Input, EQ, and Aux Sends

Each channel strip on the MG16XU offers comprehensive control over your audio signals. The input section features an XLR jack for microphones and a ¼-inch jack for line-level instruments. Phantom power (+48V) is available for condenser microphones, activated via a dedicated switch.
The EQ section provides three-band equalization – High, Mid, and Low – allowing you to shape the tonal characteristics of each channel. Adjust these controls to enhance clarity, reduce muddiness, or add warmth. Aux sends are crucial for creating monitor mixes or routing signals to external effects processors.
The MG16XU typically offers pre-fader and post-fader aux sends. Pre-fader sends are ideal for monitor mixes, while post-fader sends are suitable for effects. Utilize the pan control to position the signal within the stereo field. Gain control adjusts the input signal level, ensuring optimal signal-to-noise ratio.
Using the MG16XU’s Built-in Effects
The MG16XU incorporates a suite of digital effects, enhancing your audio productions without requiring external processors. These effects, accessible via dedicated controls on the mixer, include reverb, delay, chorus, and flanger. The ‘FX’ section typically features a send control, determining the amount of signal sent to the effects processor.
A return control adjusts the level of the effected signal blended back into the channel. Experiment with different effect types and parameter settings to achieve desired sonic textures. The manual details specific parameters for each effect, allowing for precise customization.
Remember that excessive use of effects can muddy the mix. Subtle application often yields the most professional results. The MG16XU’s effects are designed to complement, not dominate, your audio. Explore the various presets and adjust them to suit your specific needs. Careful monitoring is key to achieving a balanced and polished sound.
Understanding the MG16XU’s USB Interface
The MG16XU features a built-in USB interface, enabling direct connection to a computer for recording and playback. This eliminates the need for an external audio interface in many scenarios. The USB connection facilitates two-way audio transmission – sending signals from the mixer to your computer and receiving audio back from your computer to the mixer.
To utilize the USB interface, you’ll typically need to install the appropriate USB driver on your computer, available for download from the Yamaha website. Once connected, the MG16XU will appear as an audio device in your computer’s recording software (DAW). The manual details the specific settings and configurations required for optimal performance.

Ensure your DAW recognizes the MG16XU as both an input and output device. Adjust the USB send and return levels on the mixer to achieve a proper signal level. This interface is class-compliant, meaning it generally works without specific drivers on many operating systems.

Recording and Playback with a Computer
Utilizing the MG16XU’s USB interface, recording and playback with a computer becomes streamlined. After installing the necessary USB driver and establishing a connection, your Digital Audio Workstation (DAW) will recognize the mixer as an audio input and output device.
For recording, select the MG16XU as the input device within your DAW. You can then record individual channels or a stereo mix directly to your computer. Adjust the channel faders and pan controls on the MG16XU to achieve the desired balance before recording. Monitor the recording levels carefully to avoid clipping or distortion.
For playback, designate the MG16XU as the output device in your DAW. Audio from your computer will then be routed through the mixer, allowing you to utilize the MG16XU’s EQ and effects during playback. Remember to adjust the USB return level for optimal volume. The manual provides detailed instructions for configuring these settings.
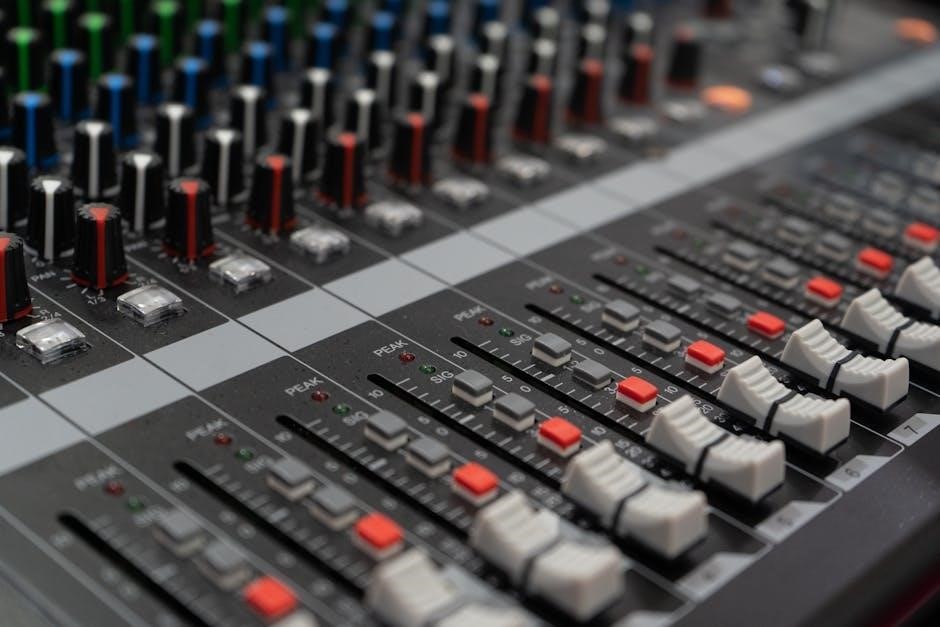
Setting Levels and Avoiding Distortion
Proper gain staging is crucial for achieving a clean and professional sound with the MG16XU. Begin by setting the input gain for each channel, aiming for a strong signal without clipping. Observe the channel’s peak level indicator; it should rarely, if ever, reach the red zone.
Adjust the faders to control the overall volume of each channel. Avoid pushing the faders too high, as this can introduce distortion even if the input gain is set correctly. Utilize the MG16XU’s EQ to shape the sound of each channel, but be mindful of excessive boosting, which can also lead to unwanted distortion.
Monitor the main output level using the master faders. Ensure that the output signal remains within the optimal range, avoiding clipping at the main output stage. The manual emphasizes careful level management to preserve audio quality and prevent damage to connected equipment. Consistent monitoring is key.
Auxiliary Sends and Returns: Routing Signals
The MG16XU’s auxiliary sends offer versatile signal routing options for effects processing and monitor mixes. Each channel features pre-fader and post-fader auxiliary sends, allowing you to direct signals to external effects units or create independent monitor mixes for performers.
Pre-fader sends are ideal for creating monitor mixes that remain consistent regardless of channel fader adjustments. Post-fader sends are suitable for sending signals to time-based effects like reverb and delay, ensuring the effect level tracks the channel volume.
Utilize the auxiliary returns to bring the processed signals back into the mixer. Adjust the return level to blend the effect with the original signal. The manual details how to configure these sends and returns for various applications, including creating complex signal chains and customized monitor setups. Careful routing enhances control.
The MG16XU’s Main Output Section
The main output section of the Yamaha MG16XU provides comprehensive control over the overall signal sent to your recording device or sound reinforcement system. It features XLR and TRS outputs for balanced connections, minimizing noise and ensuring signal integrity. A level meter displays the output signal strength, helping you optimize levels and avoid clipping.
The section includes a main fader for overall volume adjustment, as well as a dedicated monitor output with its own level control. This allows for independent monitoring without affecting the main output. The manual explains how to properly calibrate the output levels for optimal performance.
Furthermore, the MG16XU offers selectable output routing options, allowing you to send different signals to the main and monitor outputs. Understanding these controls is crucial for achieving a professional and balanced sound.
Troubleshooting Common Issues
The Yamaha MG16XU manual dedicates a section to resolving frequently encountered problems. Common issues include no sound, distorted audio, hum or noise, and USB connectivity problems. The manual guides users through systematic checks, starting with basic connections and power supplies.
For no sound, it advises verifying channel faders, pan controls, and the main output fader. Distortion is often caused by excessive input or output levels, requiring careful gain staging. Hum or noise can stem from ground loops or faulty cables, suggesting alternative cabling or grounding solutions.
USB connectivity issues are addressed with driver installation and computer recognition checks. The manual emphasizes the importance of using the latest Yamaha USB drivers. It also provides contact information for Yamaha support for more complex problems, ensuring users have resources for a smooth experience.
Yamaha MG16XU and YouTube Verification
While the Yamaha MG16XU manual primarily focuses on audio mixing, understanding YouTube verification is crucial for creators utilizing the mixer for content. YouTube requires account verification to unlock essential features for content creators. This process involves providing a phone number to receive a verification code via text or voice call.
Verification enables uploading videos exceeding 15 minutes, adding custom thumbnails for increased click-through rates, and initiating live streams for real-time audience engagement. Furthermore, verified accounts can appeal Content ID claims, protecting their content from unauthorized use.
The MG16XU facilitates high-quality audio for YouTube videos, but the platform’s features are gated behind verification. Accessing the YouTube Partner Program (YPP) – offering monetization and creator support – also necessitates a verified account. Therefore, verifying your YouTube channel is a vital step for any creator leveraging the MG16XU for content creation.
YouTube Channel Customization Options
Optimizing your YouTube channel’s appearance is vital for attracting viewers, even when using a high-quality mixer like the Yamaha MG16XU for audio. Customization options allow you to create a branded and engaging experience. The ‘Home’ tab is the first impression, and can be tailored to showcase your content effectively.
You can feature a channel trailer, a short video introducing your channel’s theme and content. A featured video highlights your best or most recent work. Featured sections organize content into playlists like ‘For You’ or ‘Top Community Clips’, enhancing navigation.
These options aren’t directly related to the MG16XU’s operation, but are crucial for maximizing the reach of content created with the mixer. A well-designed channel encourages viewers to explore more videos, increasing watch time and subscriber growth. Strategic customization complements the high-quality audio provided by the MG16XU, creating a professional and appealing online presence.
YouTube Partner Program (YPP) Eligibility
While the Yamaha MG16XU enhances your audio production, monetizing your content requires meeting YouTube’s Partner Program (YPP) criteria. Eligibility isn’t directly tied to the mixer itself, but crucial for creators using it to produce videos. To qualify, you must adhere to YouTube’s monetization policies and community guidelines.
Key requirements include having at least 1,000 subscribers and 4,000 valid public watch hours in the past 12 months. You also need a linked AdSense account for payments. Account verification via phone number is mandatory, enabling features like longer video uploads and custom thumbnails.
The YPP unlocks revenue sharing from ads, access to creator support, and advanced features. High-quality audio, achieved with the MG16XU, can contribute to increased watch time, aiding YPP eligibility. Meeting these criteria allows you to transform your passion for audio into a potential income stream, complementing your investment in professional equipment.
Accessing Yamaha Support and Additional Resources
Beyond the official Yamaha MG16XU manual, a wealth of support and resources are available to enhance your experience. Yamaha’s website provides a dedicated support section with FAQs, troubleshooting guides, and downloadable drivers. ManualsLib and Manualzz offer free PDF versions of the owner’s manual for convenient access.
YouTube is a valuable resource, hosting numerous tutorials and demonstrations from both Yamaha and independent users. These videos can clarify complex features and offer practical application tips. Online forums dedicated to audio engineering and music production provide platforms for asking questions and sharing knowledge.
For direct assistance, Yamaha offers customer support via phone and email. Consider exploring online communities and user groups for peer-to-peer support. Leveraging these resources ensures you can maximize the MG16XU’s potential and resolve any issues efficiently, fostering a seamless workflow.
Leave a Reply
You must be logged in to post a comment.